10 Steps to Create Website Using Canva AI
10 Steps to Create Website Using Canva AI – Are you in a rush to make a cool website without any hassle? Well, Canva is here to save the day! It uses smart technology like Magic Write and Magic Design to help you create an amazing website in a jiffy. We’ll guide you through 10 simple steps and give you some awesome tips and tricks to make the most of Canva’s AI features, saving you a bunch of time! So get ready to impress everyone with your new website, and let Canva do the hard work for you!

Step#1 : Using Magic Design
Creating a website may seem like a daunting task, but with Canva’s easy-to-use platform and helpful features, you’ll be up and running in no time. Follow these simple steps to create your dream website:
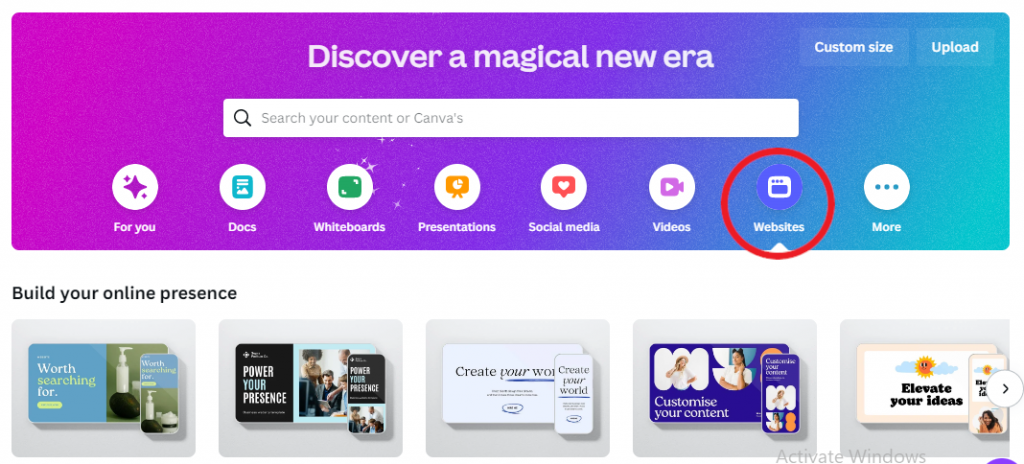
- Click on the “Website” tab on Canva’s homepage to view all the available website templates.
- Choose the type of website you want to create, such as a business website, retail website, or portfolio website. Canva offers a variety of templates to fit your needs.
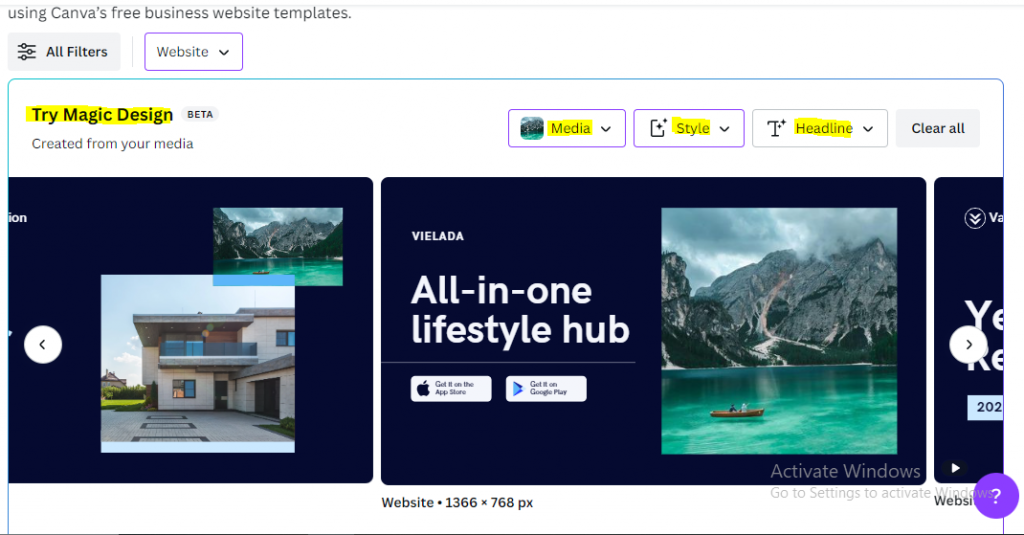
- Once you’ve browsed the templates, you’ll see an option to “Try Magic Design.” This is a beta version of Canva’s AI-powered design feature that can help you create a website quickly and easily.
- To use Magic Design, simply upload an image that you want to use for your website. Canva will then generate a basic design based on the subcategory of the image you uploaded.
- Next, select a theme and color palette from the options provided by Canva. This will give your website a cohesive look and feel.
- Finally, you can customize the template or page that Canva generates for you. Add your own text, images, and branding to make it unique to your business or personal style.
Step#2 : Using Canva’s Copywriting AI tool Magic Write
Follow these simple instructions to make the most of this powerful feature:
- Look for the Canva assistant button on the lower right corner of the screen. Click on it to access Magic Write.
- While Magic Write is a pro feature, free users can still use it up to 25 times. So even if you’re a free user, you should be able to access this feature.
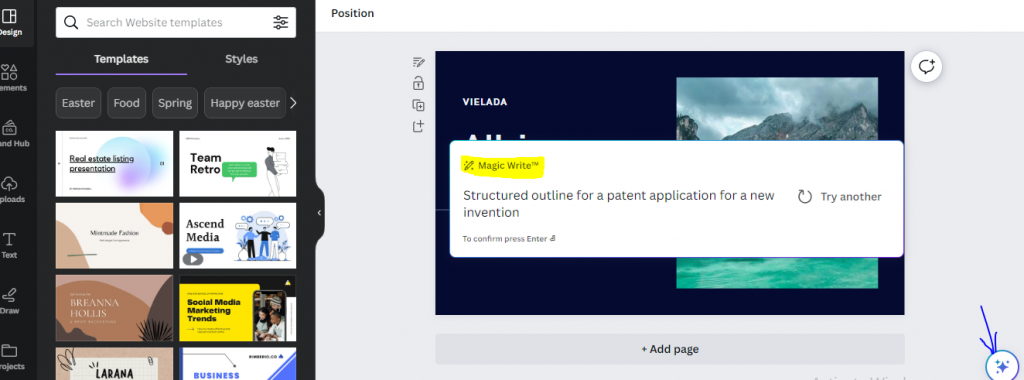
- When you click on Magic Write, a box will appear asking for a prompt. Think of this like a chatbot – you need to provide a command or input to get an output.
- To get started, ask the AI to generate a landing page or homepage for you. You can specify how many sections you want and what each section should include.
- Once you’ve given the prompt, hit enter and let Canva’s Magic Write do the rest. It will generate a structure for you in the form of text or instructions that you can follow to create your sections.
Step #3: Build your website pages faster with Canva templates & Styles
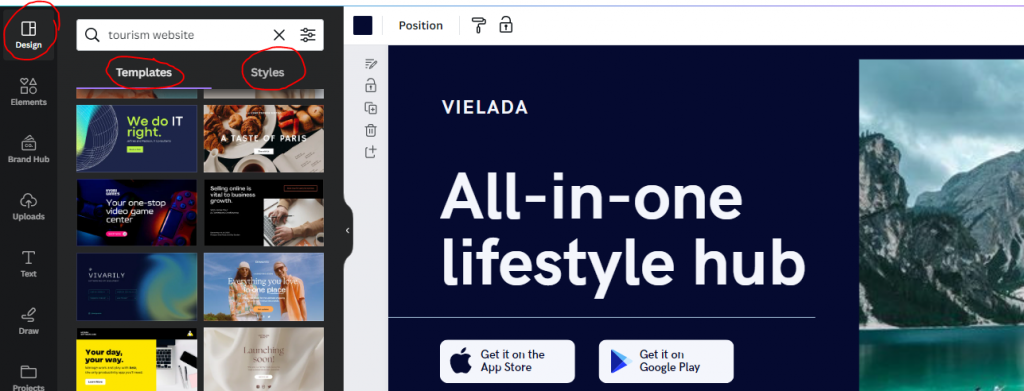
- Search for your website’s subcategory or niche in the Design tab of Canva. This will show you a wide variety of templates that you can use to create your website’s design.
- Browse through different templates and select the ones that appeal to you the most. Canva has a vast library of templates to choose from, so you’re sure to find one that suits your website’s style and content.
- Once you’ve selected a template, you can customize it to fit your website’s specific needs. You can change the images, text, color scheme, and other design elements to make it unique to your brand.
- Add all of the sections that you want to include on your website, such as customer reviews, contact information, and more. These sections are often available in Canva’s templates, so you can simply add them to your design.
- Canva will generate a color palette for you in the Styles tab, which will help you stay on-brand for all of the pages of your website. You can also change the font styles and sizes manually to match your brand guidelines.
Step #4: Use Magic Write to come up with your brand’s name
Naming your brand is a crucial step in building a website, and Canva’s Magic Write can make it easier for you. Here’s how you can use this tool to come up with a brand name:
- Click on the Canva Assistant button located on the lower right corner of the screen.
- Click on the Magic Write option.
- In the prompt box, type “Brainstorm names for my website.”
- Hit enter, and Magic Write will generate a list of names for your brand.
- Select a name that best represents your brand and resonates with your audience.
- Create a tagline that complements your brand name and summarizes your website’s purpose.
By using Canva’s Magic Write, you can save time and generate unique and creative names for your website. Now that you have a name and tagline for your brand let’s move on to the next step.
Step #5: Fine-tune your website’s copy with Magic Write
- Now that you have your website’s name, it’s time to focus on the content. This is where Magic Write comes in handy once again!
- To fine-tune your website’s copy, simply select a text box and click on the Magic Write button.
- Magic Write will then ask you to provide a prompt or topic that you want the AI to write about. You can be as specific or as general as you want.
- For example, if you want to create a catchy tagline for your website, you can prompt Magic Write with something like “Write me a funny tagline for my house-related website”.
- The AI will then generate a variety of suggestions for you to choose from, using different tones and styles that you can select from based on your preferences.
- Use adjectives to give Magic Write an idea of the tone and style you want the AI to use. For example, if you want your tagline to be sassy or humorous, be sure to include those words in your prompt.
- You can also use Magic Write to generate content for your “About Us” section, product descriptions, and other parts of your website.
- With Magic Write, you can save time and come up with compelling content for your website without having to write everything from scratch!
Step #6: Make your photos pop with Background Remover
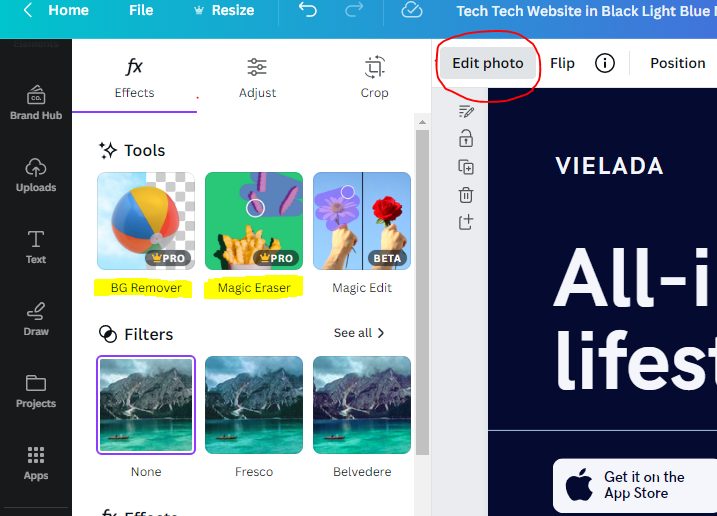
To use Background Remover, follow these steps:
- Upload the photo you want to edit onto Canva.
- Click on the photo to select it.
- Click on the “Effects” button on the left-hand side of the screen.
- Click on “Background Remover” from the list of effects.
- Canva will automatically detect the background of your photo and remove it.
- Use the “Adjust” button to make any necessary tweaks to the background removal.
- Once you’re happy with the result, click “Apply” to save the changes to your photo.
With Background Remover, you can easily make your photos stand out by removing distracting backgrounds and placing your subject in a new context. This can be particularly helpful if you want to showcase your product or services in a unique way.
Step #7: Enhance your photos with Magic Eraser
To make your photos look their best, you can use the Magic Eraser tool in Canva. With Magic Eraser, you can easily remove unwanted elements from your photos, such as distracting backgrounds, logos, or other objects that might detract from the main focus of the image. This tool is especially useful if you want to touch up product photos or create images that look more professional and polished.
To use Magic Eraser, simply upload your photo to Canva and select the Magic Eraser tool from the toolbar. Then, click on the area of the photo that you want to remove, and the tool will automatically erase it for you. You can also adjust the size and intensity of the eraser to get the perfect effect.
By using Magic Eraser, you can create photos that really stand out and make your website look more attractive to visitors. So give it a try and see how it can transform your images!
Step #8: Unleash your creativity with Canva Draw!
Want to add some extra flair and personality to your website? Look no further than Canva Draw! This brand-new AI feature lets you get creative and add some fun doodles to your designs.
With different pens and colors at your fingertips, you can let your imagination run wild and add playful touches that will make your website stand out. Whether it’s a whimsical illustration or a hand-drawn border, Canva Draw gives you the power to create something truly unique and eye-catching.
- Click on the “Draw” option in the left-hand menu of Canva.
- Select a pen type and color from the options available.
- Use your mouse or touchscreen to draw doodles or illustrations on your canvas.
- Don’t worry about making mistakes, as the “Undo” button allows you to easily correct any errors.
- Experiment with different doodle styles and colors to add a unique and playful touch to your website visuals.
Step #9: Turn words into the perfect photo with Text To Image
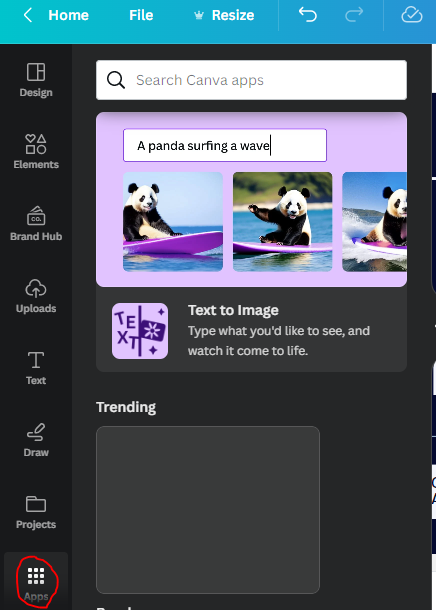
- Canva has an AI feature called Text to Image.
- Text to Image helps you to convert word prompts into custom photos.
- To find Text to Image, click on the Apps tab and look for the first option.
- In the prompt box, you can tell how you want your image to look like and select the style.
- After generating the image, you can use it in your website design and change the images wherever you want.
Step #10: Translate your website into any language in just one click
- Canva also offers an AI-powered feature to translate your website into different languages.
- This feature is useful if you want to localize your website for different markets or audiences.
- To access this feature, go to the “My Apps” tab and find the “Translate” feature.
- Select the text box you want to translate and click the “Translate” button.
- Canva will automatically translate the text into the language of your choice.
- With this feature, you can easily translate your website into any language with just a few clicks.
- This helps you reach a wider audience and cater to the needs of users from different regions.
- Once you’ve translated your website, it’s now complete and responsive to different screen sizes.
So, these are the 10 Steps to Create Website Using Canva AI.
You can also start learning from scratch step by step from Canva’s Official site
Click to read more about:
- Blockchain Summit London 2023
- Web 3.0 Conference Amsterdam | May 19, 2023 | Blockchain Conference
- Web3 Weekend 2023 Asia | Bali, Yogyakarta and Jakarta | May 8-13, 2023
- Istanbul Blockchain Summit 2023 | May 8-11, 2023 | Hilton Bomonti Hotel
- Bitcoin Conference Miami 2023 |Miami Beach Convention Center|May2023
